
# TotalView 14.1+: Configuring Microsoft NPS for Radius Authentication
If you are using Microsoft Network Policy Server (NPS) for RADIUS authentication, follow these steps to set it up effectively with TotalView 14.1+. This guide will walk you through the entire process, ensuring a smooth configuration.
### 1. Open the Network Policy Server Console
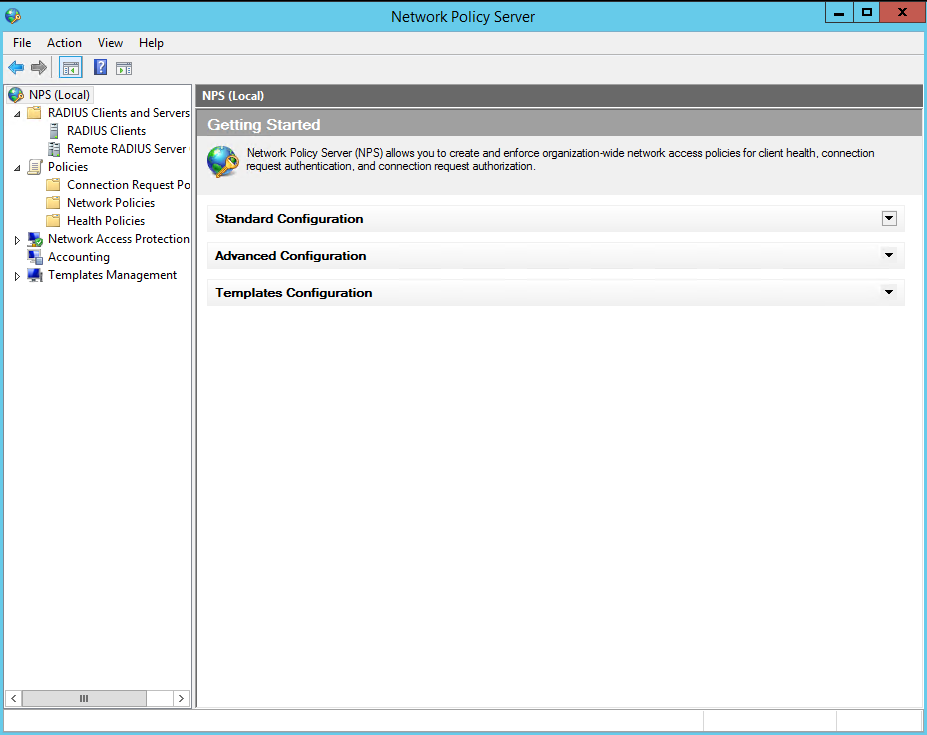
Begin by launching the Network Policy Server (NPS) console on your Windows server. You can find this by searching for "NPS" in the Start menu. This console is your primary interface for managing RADIUS settings.
### 2. Setup the TotalView Server as a RADIUS Client in NPS
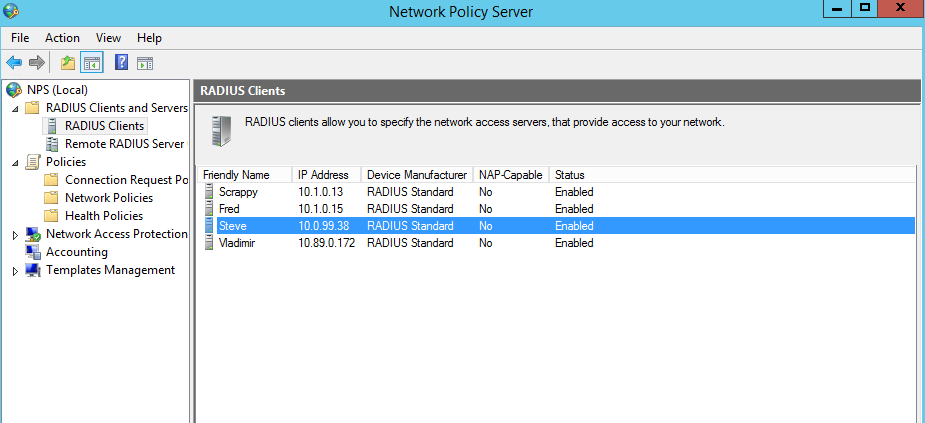
In the NPS console, navigate to the "RADIUS Clients and Servers" section. Here, you will add your TotalView server as a RADIUS client. Specify the client IP address of the TotalView server and create a strong "Shared Secret" password. This shared secret will be essential for configuring the TotalView server to communicate securely with NPS.
### 3. Setup a Network Policy for TotalView Authentication
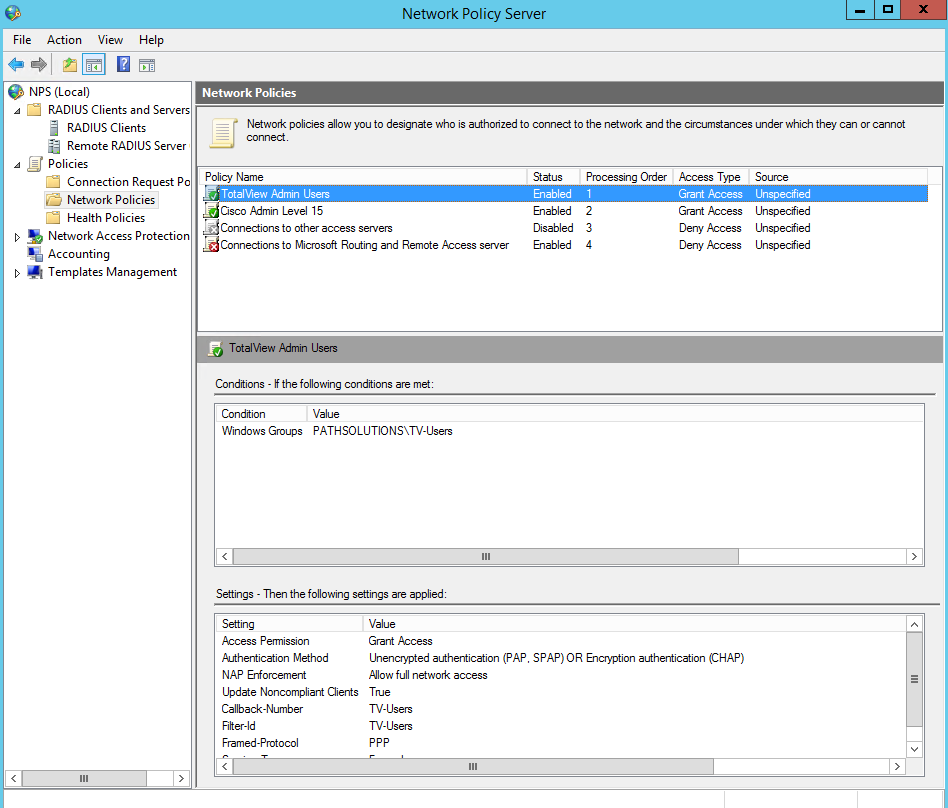
Next, create a new network policy specifically for TotalView authentication. This policy will define the conditions under which users can authenticate through TotalView, including any restrictions or requirements.
### 4. Create a New Policy for the Specific TotalView User Role
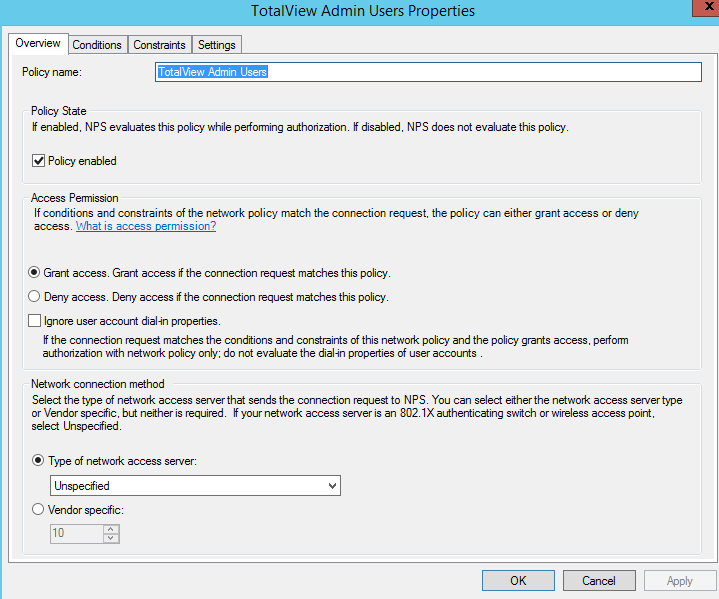
Within the network policy, establish a new policy tailored to the specific user roles you wish to manage in TotalView. This allows for differentiated access based on user roles, enhancing security and management.
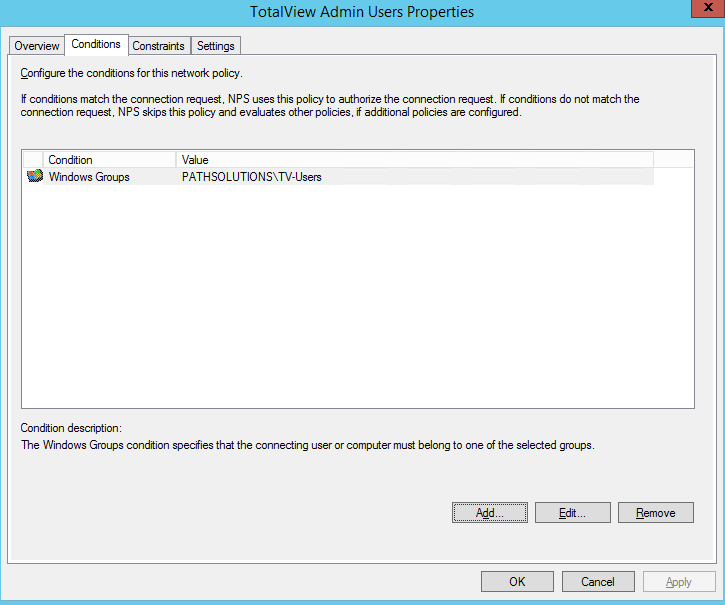
### 5. Specify Which AD Security Group to Map the New Policy
Link the newly created policy to an Active Directory (AD) security group. This step ensures that only users within this group can authenticate using the TotalView server, providing an added layer of control.
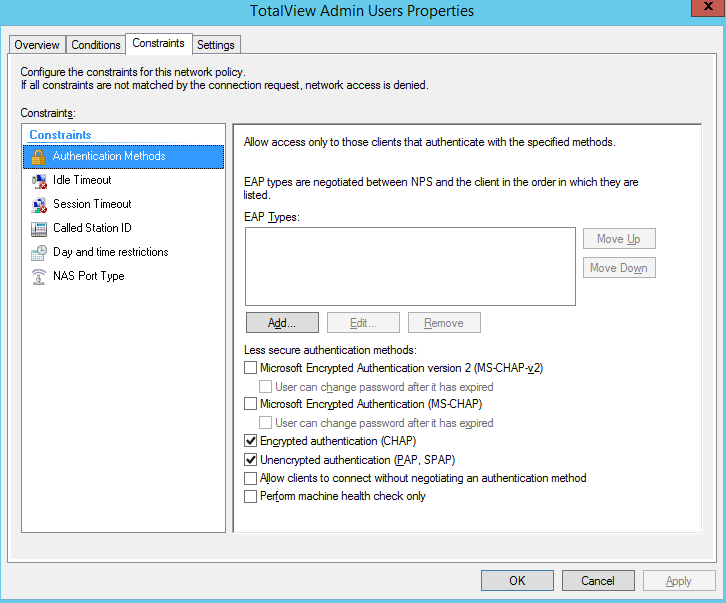
### 6. Specify the Supported Authentication Method (CHAP and PAP)
In this step, configure the authentication methods that will be supported by your setup. Ensure that both CHAP (Challenge Handshake Authentication Protocol) and PAP (Password Authentication Protocol) are enabled, as these are commonly used methods for RADIUS authentication.
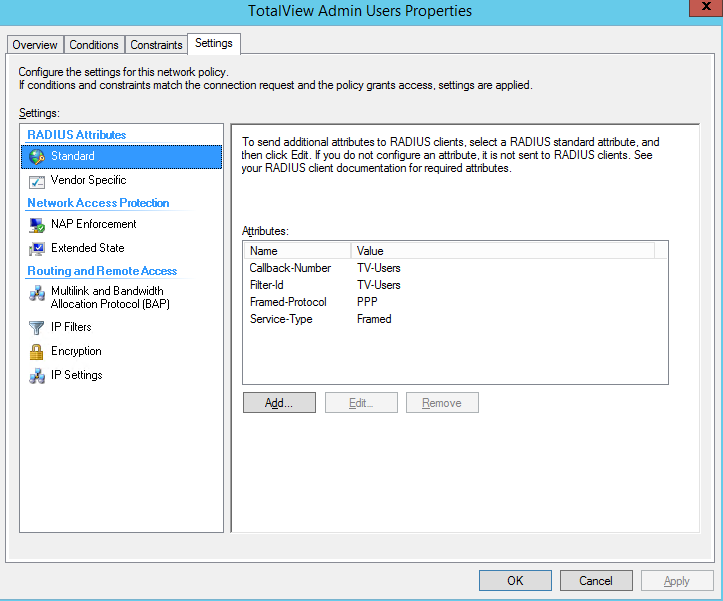
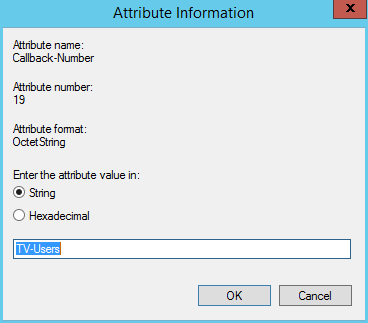
### 7. Specify the RADIUS Attribute to Use for Passing the Security Role Back to TotalView
You will need to define the RADIUS attribute that will communicate the security role back to TotalView. Ensure that the value is set as a "String." For custom values, specify the TotalView security role that should be returned upon successful authentication. Make a note of the attribute name, which in this case is "Callback-Number."
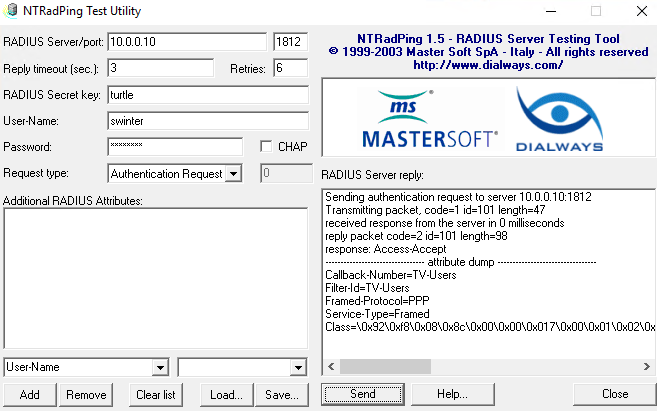
For testing RADIUS on the TotalView server, you can use the NTRadPing test utility. This tool will allow you to verify that authentication is functioning correctly. Pay attention to the attribute dump during testing to ensure everything is configured properly.
### 8. Configure The NPS Server In TotalView Radius Authentication
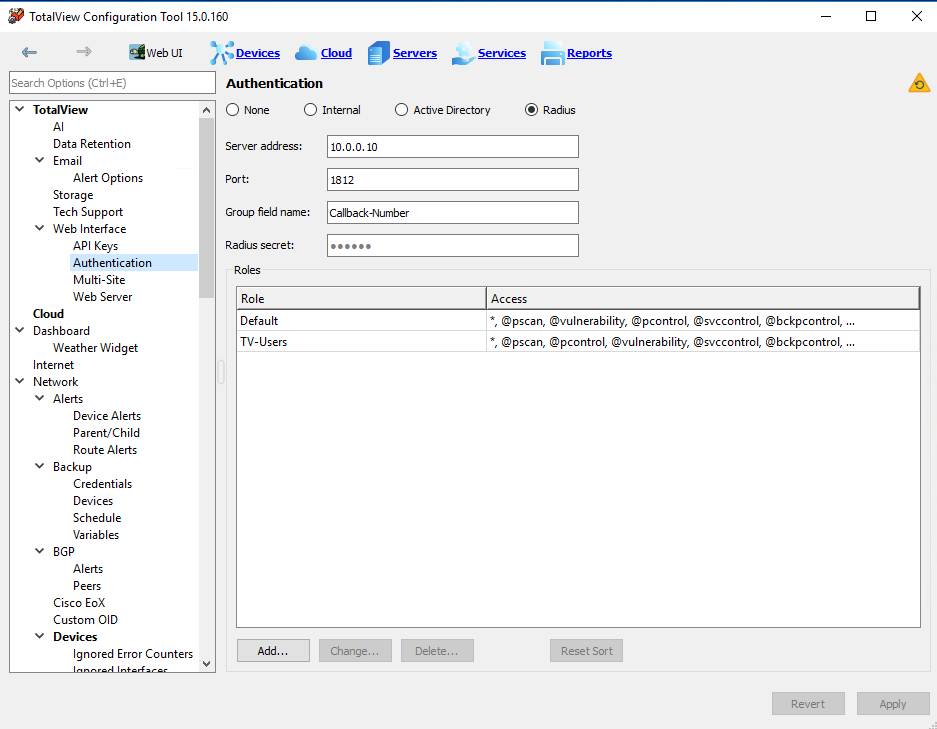
In the TotalView configuration tool, navigate to the "Web Interface" section under "Authentication." Set the authentication type to RADIUS. Specify the NPS server as the "Server Address" and enter the custom RADIUS attribute to listen for in the response. Confirm that the role name matches the value in the custom RADIUS attribute.
### 9. Apply and Restart the TotalView Service
Finally, apply your changes and restart the TotalView service to ensure that all configurations take effect. Test the RADIUS username and password to verify that the correct role is assigned to the user upon successful authentication.
By following these steps, you will successfully configure Microsoft NPS for RADIUS authentication with TotalView 14.1+, ensuring secure and efficient user access management. If you encounter any issues, please reach out to our support team for further assistance.